
Tracks
Our home Pit Lane 3

In the last update I explained how we made a double Pit Lane with the lanes farther apart so we could get Pit crew on both sides of some cars. What we wanted to do next was to make it possible for there to be more than one way in and out of the garages so all the cars didn’t have to go through the same lane and block one another. This would obviously involve another Pit lane ‘flipper’ piece but also some more complex cutting up and joining of other track pieces. However, again we realised that some of the tighter R1 curves could be useful and decided to have a go. We began by attaching another Pit Lane entry to the end of the first one and then experimented with laying other track pieces on top until we found a way to get the lanes to match up to access Garage 4 – 6.
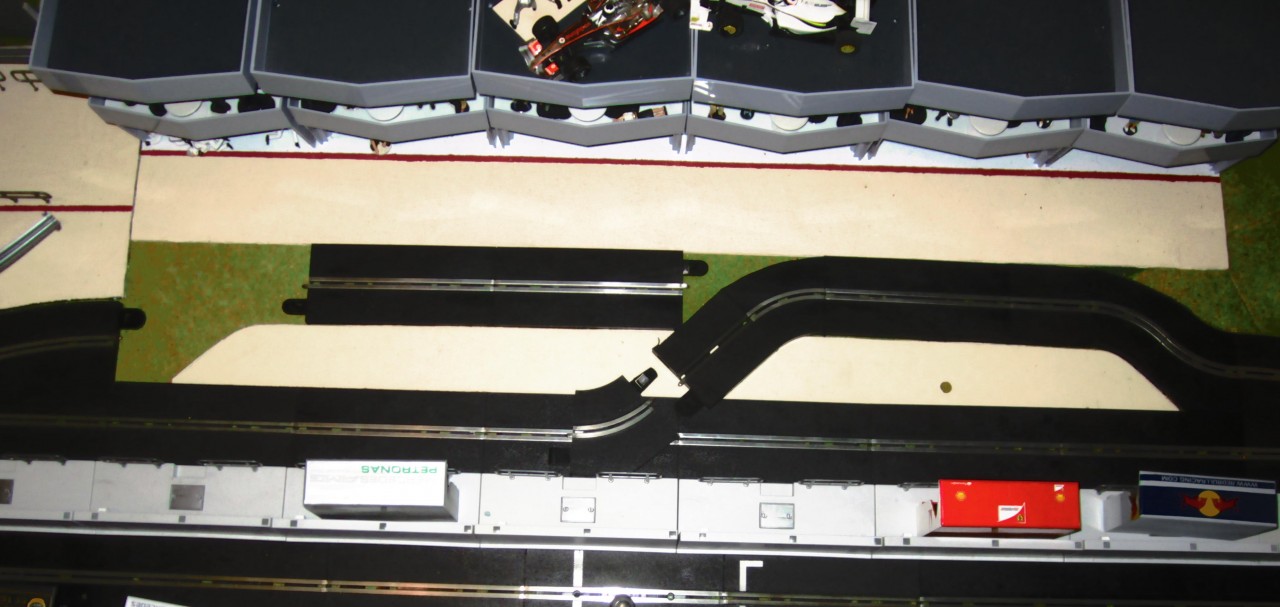
Once that looked possible we needed to make sure we would do the same for the entry to Garages 1 – 3. Again we experimented with track pieces that if we cut them into single lane pieces would join up the inner and outer lanes. Again it looked possible and although we would still have to create a crossover we decided to give it a go and start cutting two lane pieces into the single lane pieces we wanted.
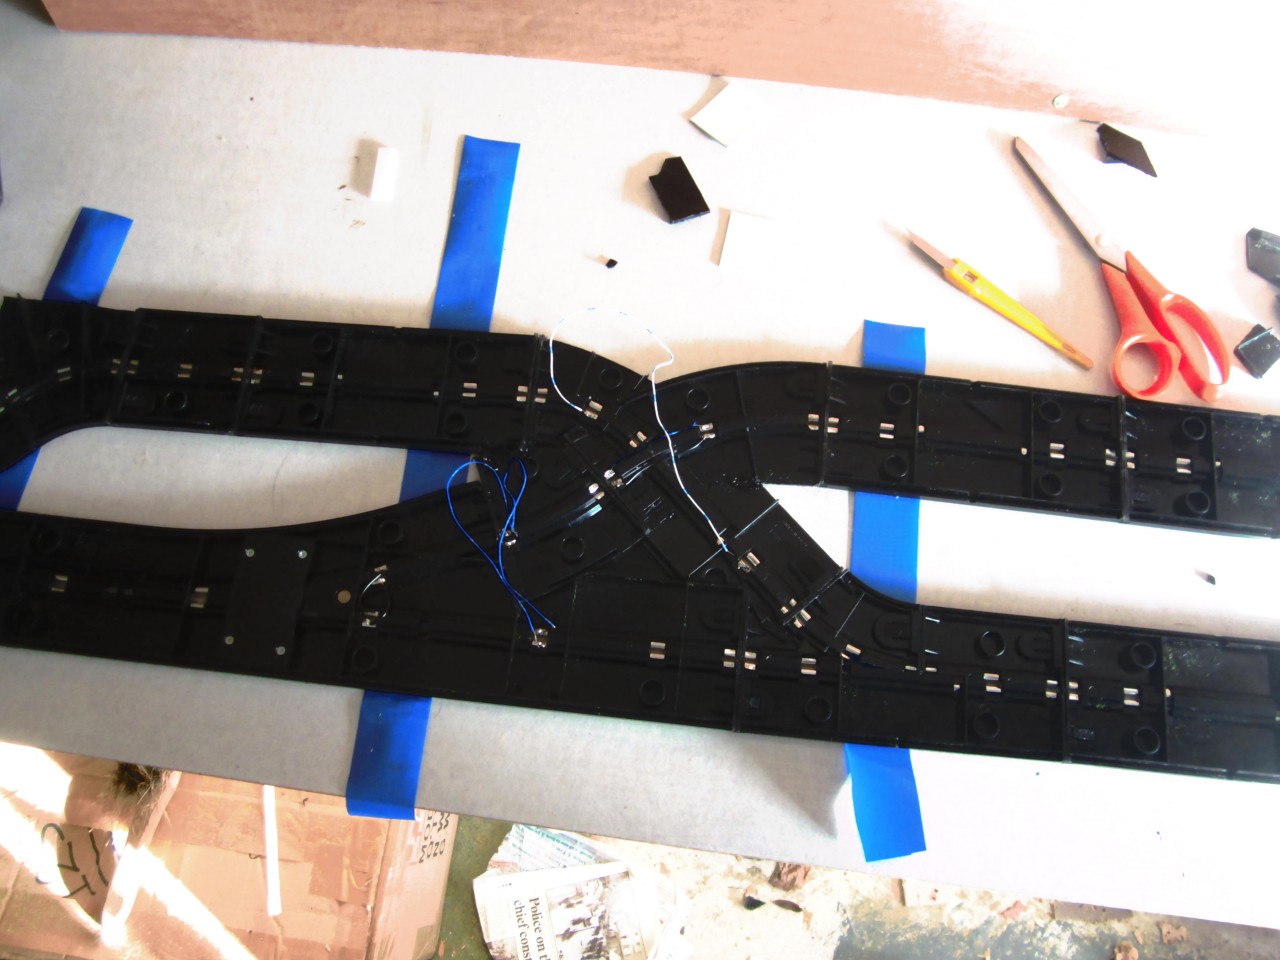
At this point we got so focussed on what we were doing that we forgot to take many pictures. (sorry!) However after cutting the curves we bit the bullet and cut the Pit entry piece in order to attach the new curves to that. Then we cut into one of the single lane straights to make the exit for Garages 1 – 3. Of course at this point we could only make one lane or the other but not both at the same time. Some of this was fairly easy but other bits were really quite fiddly. This was specially true of creating the crossover. Again apologies that we don’t have more details. Apart from making sure that the cars will run smoothly through it, it is also important to trim back the rails so that there is no shorting as cars pass over it and we soldered some wires across the places where the rails no longer connected. We tested this a lot to make sure it worked before going any further.
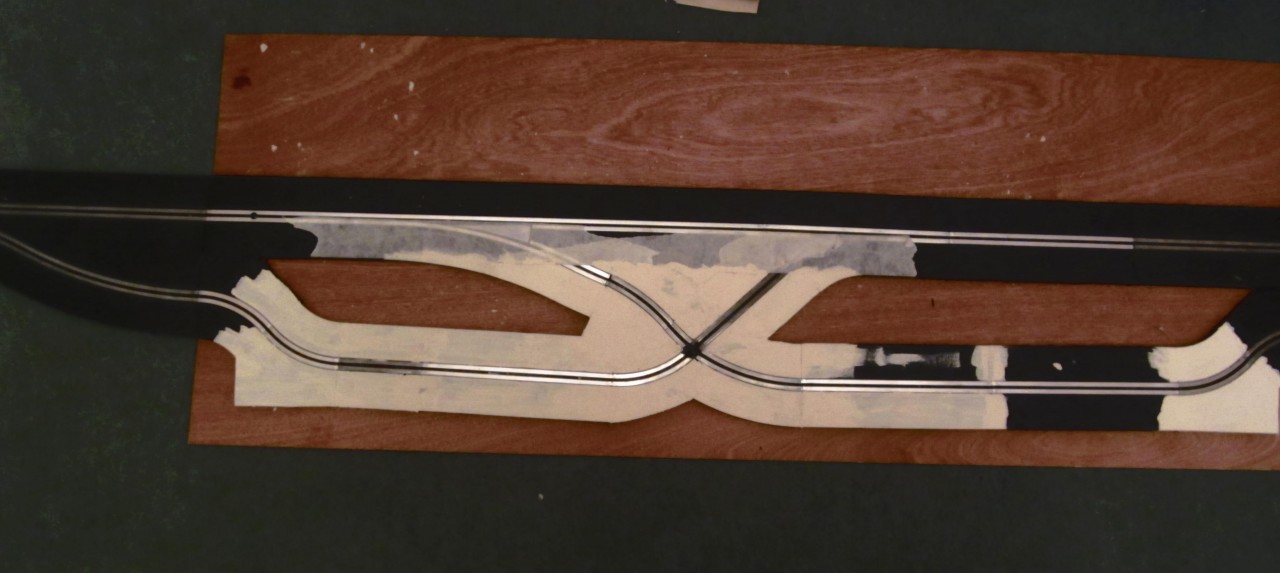
Now it was necessary to ‘weld’ some of the cut pieces together by heating with a soldering iron. (Don’t do that in an enclosed space!!! Very nasty fumes.) We also filled in some gaps with araldite. To be honest the top didn’t look very good now so we decided we needed to paint the whole area with a concrete colour. However we decided to leave the ‘drive-through’ lane black as we didn’t want to paint the whole track. So we masked it off and experimented. Ordinary emulsion seemed to work for us – after we gave the track a good clean.
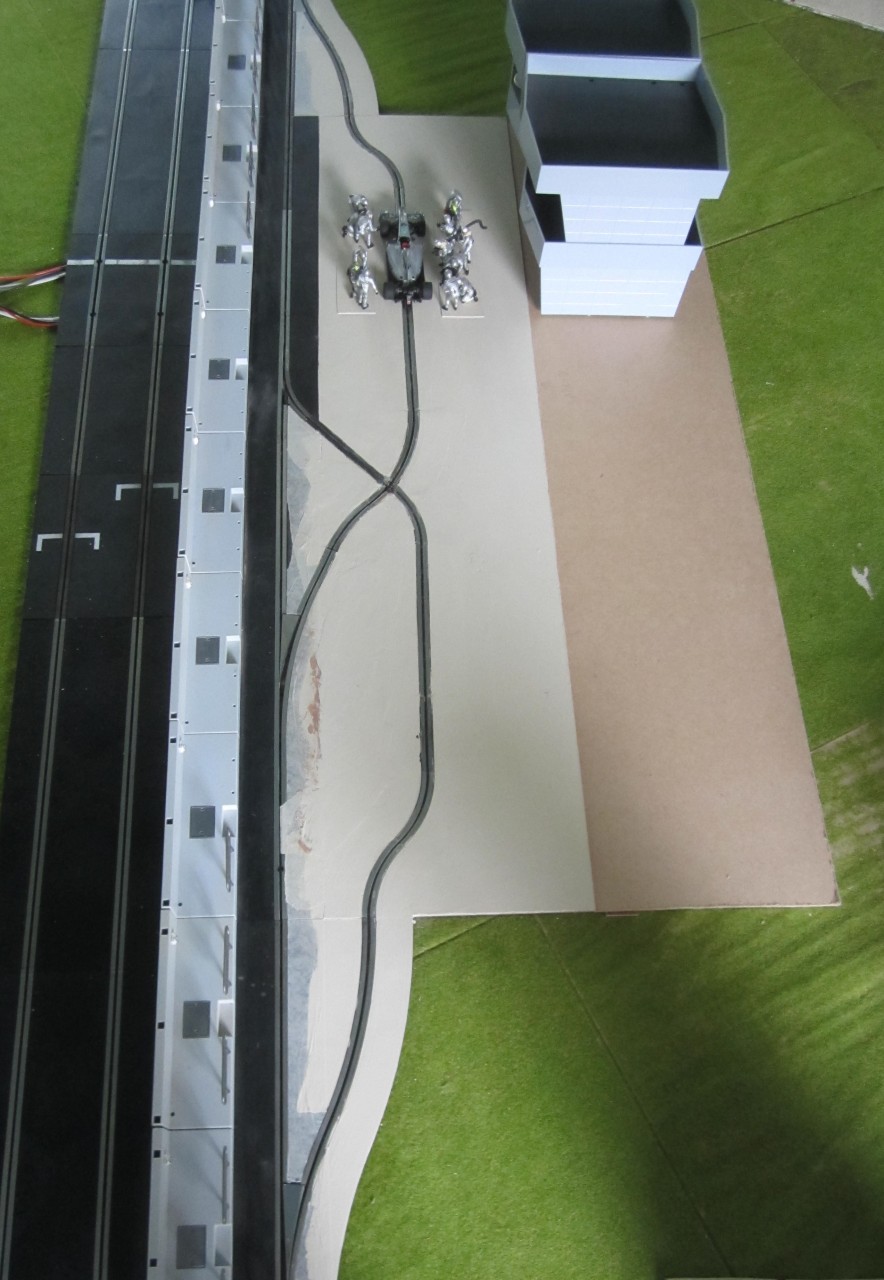
Finally we decided that we should put it all on a base to support it as some joints were not very robust. That also allowed us to glue some little supports under some pieces of track where we had needed to cut away the support ribs. We were now into the ‘cosmetic stuff. We filled in the spaces either side of the new crossover and along by the garages by marking and cutting some MDF. Once these were fixed to the baseboard they held the track in place well. We then spent quite a while filling gaps between track and MDF and rubbing down the surface of the whole piece. (We wanted it to look as much one piece as possible.) And we then painted it all over with the emulsion. In the picture there is still some masking tape in place but we have moved on by adding another pieced of MDF for the garages to stand in. More about that to come.
So are we pleased with it? Very.
Would it have been easier if Scalextric would make something like this? Definitely – but it probably wouldn’t work for them commercially.
Would it have been easier to rout it? For creating the lanes – Very much! But fitting the flipper piece in would have been tricky and joining the plastic track to the routed wood would have been challenging.
So that is what we did and in the next post we will explain how we set about making it look better.